|
Listen to article
Getting your Trinity Audio player ready...
|
Hey there! If you’re all about making cool custom shirts with sublimation but don’t have access to sunlight, no worries! No Sun, No Problem! I have got you covered with some simple tricks for “How to bleach shirts for sublimation without sun.” Forget about stepping outside – let’s bring the bleaching fun indoors.
This guide will walk you through easy-peasy indoor techniques, making it a breeze to create awesome shirts that are ready for sublimation. Ready to dive in and make your shirts stand out without relying on the sun? Let’s get started!
Contents
How to bleach shirts for sublimation without sun – Techniques
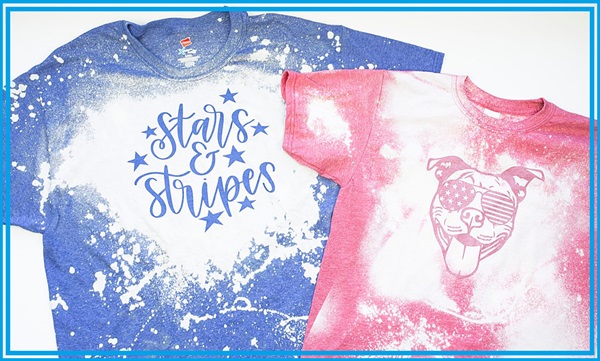
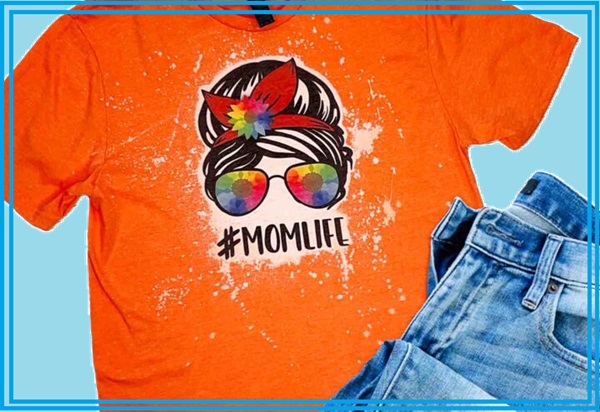
So, I was experimenting with making these really cool shirts, and I found this awesome two-step process. First, I bleached the shirt to get this clean white background, and then I added these vibrant sublimation prints. What’s cool is if the shirt already has some stains from sublimation ink, it’s like a bonus because it gives me a perfect canvas to get creative with bleaching!

When you bleach the shirt, it transforms into this fantastic clear white canvas. And when I put on the sublimation prints, the colors just pop and look so bright. I found that using cotton or linen shirts works best for this whole process. Oh, and here’s a really cool trick: if you start with a black or dark-colored shirt and bleach it, the prints come out super vivid without messing up the fabric or the original design. It’s like giving the shirt a whole new life with these eye-catching colors!
When I recently tried this really cool technique to bleach shirts for sublimation without needing any sunlight. It turned out awesome, and I’m excited to share my experience with you! Here’s how I did it:
Materials I Used:
- Plain cotton shirts
- Bleach
- Plastic spray bottle
- Plastic gloves
- Plastic sheet or old newspapers
- Stencils or adhesive vinyl (optional)
My Step-by-Step Experience:
1. Setting Up My Space:
I laid down an old plastic sheet to protect my workspace and put on some trusty plastic gloves to keep things neat.
2. Planning My Design:
I had a rough idea of the design I wanted on my shirt. I also had stencils on hand, but you can totally freehand it if you’re feeling creative!
3. Mixing the Bleach Solution:
In a plastic spray bottle, I mixed equal parts bleach and water. Adjusting the ratio allows for more control over the bleaching effect.
4. Applying the Bleach:
I sprayed the bleach solution onto the shirt, making sure to focus on the areas where I wanted my design. It’s all about that even mist!
5. Watching the Magic Happen:
As the bleach started working its magic, I could see my design emerging. It was such a cool transformation!
6. Rinsing and Neutralizing:
I rinsed the shirt in cold water to stop the bleaching process. To be extra safe, I soaked it in a mix of water and hydrogen peroxide for a bit.
7. Washing and Drying:
After a quick wash with mild detergent, I let the shirt air-dry. The anticipation was real!
8. Checking Out the Design:
I couldn’t help but admire the unique design the bleach created on the shirt. It turned out better than I expected!

9. Getting Ready for Sublimation:
Following the sublimation ink and heat press instructions, I prepped everything for the final step.
10. Sublimating My Design:
I applied the sublimation transfer paper onto the bleached shirt and used the heat press. The colors really popped, and the design looked fantastic!
11. Final Touches:
I made sure to let my newly sublimated shirt cool down before trying it on or tossing it in the wash.
So, there you have it – my experience bleaching shirts for sublimation indoors. It’s a creative and fun process, and the best part is you don’t need any sunlight! Give it a shot, and I’m sure you’ll love the results as much as I did.
Impact of sunlight on bleached shirts
Sunlight can have both positive and negative effects on bleach shirts, depending on how it is utilized and the specific goals of the bleaching process. Here are some effects to consider:
Positive Sunlight Vibes:
- Boosting the Bleaching: I noticed that when I took my bleached shirt out into the sunlight, the whole bleaching process got a bit of a turbo boost. It was like the sun was teaming up with the bleach to make the design more vibrant and defined.
- Colors Popping: Sunlight worked its magic on the colors. They just popped out more, creating this really cool contrast on the shirt. It gave the whole thing a natural and appealing look.
- Sunlight and UV Fun: Those UV rays from the sun added a little extra flair to the fabric. It was like the sun and the bleach was having a little party on my shirt, creating these unique patterns and shades.
Watch Out for the Sun’s Negative Side:
- Uneven Exposure: I did notice that, depending on the angle of the sun, some parts of the shirt got more love than others. It led to a bit of uneven bleaching, which wasn’t what I had in mind.
- Overdoing It: On a scorching hot day, I left the shirt out for too long, and it got a bit over-bleached. Some of the finer details in my design got lost in the sun’s enthusiasm.
- Fabric TLC: I realized that the sun, while friendly to my design, might not be the best long-term buddy for the fabric. It could weaken the fibers over time, so I had to be mindful of that.

Tips from My Sunlit Experience:
- Keep an Eye Out: Watch your shirt closely during the sunbathing session. Move it around to make sure every part gets just the right amount of sunlight.
- Stencil Power: Using stencils or vinyl helped me control which areas got sun-kissed. It made the design more intentional and precise.
- Quick Rinse Rescue: As soon as I got the desired effect, I rushed to give my shirt a quick rinse. It was like hitting the pause button on the sun’s bleach party.
- Shade and Sunblock: Sometimes, you need to protect your shirt from too much sun. Find a shady spot or even use a bit of sunblock on specific areas to control the exposure.
So, my experience with sunlight and bleach shirts was a bit of a rollercoaster. While it brought out some awesome effects, I had to keep an eye on things to avoid the sun’s unpredictable side. It’s like the sun and bleach together can create some real magic, but you’ve got to be the director of the show!
FAQs
Q: How long should I leave the bleach on the shirt during indoor bleaching?
A: Monitor the bleaching process closely. The time may vary based on the desired effect, but it’s generally recommended to check the progress every few minutes until you achieve the design you want.
Q: Can I use any type of shirt for indoor bleaching?
A: Cotton or linen shirts work best for indoor bleaching. They absorb the bleach well and provide a good canvas for sublimation.
Q: Is indoor bleaching safe?
A: When done with proper precautions, indoor bleaching is generally safe. Wear plastic gloves, work in a well-ventilated area, and take care to avoid direct contact with bleach.
Conclusion
So, after trying this whole indoor bleaching thing for sublimation, I got to say, it’s been a game-changer. No need to wait for the sun – I can create awesome shirts whenever I feel like it, right in my own space.
Remember to keep an eye on things as you go through the steps. Play around with the bleach mixture, and most importantly, enjoy the whole adventure of making your shirts unique and totally ‘you.’ So, next time you’re feeling crafty and thinking about how to bleach shirts for sublimation without sun, grab your materials and have a blast making personalized shirts indoors. It’s a creative journey that brings your ideas to life, and its super fun!


1 comment