|
Listen to article
Getting your Trinity Audio player ready...
|
Starting the journey of mastering how to bleach a shirt at home has been an exhilarating adventure for me. As someone who loves to experiment with DIY projects, I’ve discovered that bleaching shirts offers a fantastic opportunity to unleash creativity and revitalize old garments.
Through trial and error, I’ve honed my skills and learned valuable techniques that I’m excited to share with you. So, join me as I take you through my personal experience and the best practices for achieving stunning results in the comfort of your own home. Get ready to dig into the world of DIY shirt bleaching and unleash your inner artist!
How to bleach a shirt at home
As an avid DIY enthusiast, I recently embarked on a project to bleach one of my old shirts to give it a new lease on life. Armed with some bleach, rubber gloves, and a sense of adventure, I set out to transform my plain shirt into a unique piece of wearable art. There is also a way to bleach shirt without sun method. Here’s how my experience unfolded, along with some detailed steps for anyone looking to try this at home:
Preparation and Gathering Supplies:
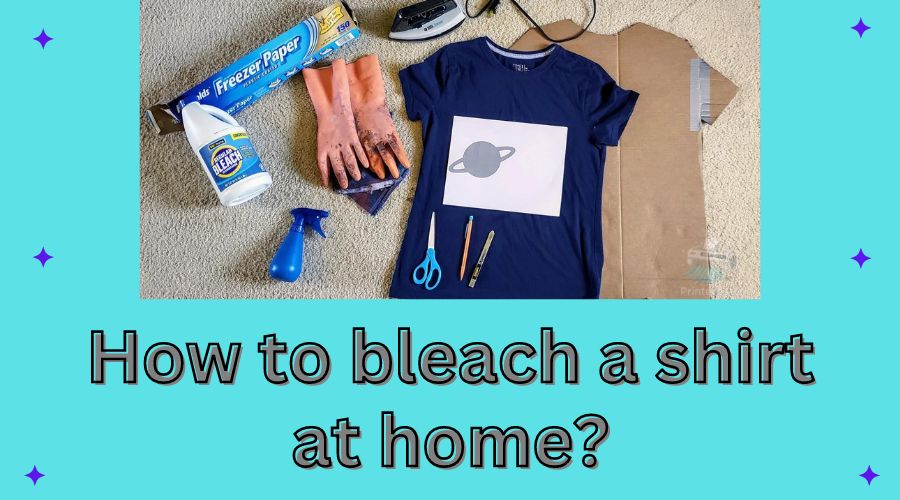
Before diving into the bleaching process, I laid down old newspapers on my work surface to protect it from any potential spills. Putting on rubber gloves was a must to shield my hands from the bleach. For this project, I used a spray bottle to apply the bleach solution onto the shirt, ensuring an even distribution.

Mixing the Bleach Solution:
Mixing the bleach solution was a crucial step. I opted for a 1:1 ratio of bleach to water for a moderate bleaching effect. This ratio can be adjusted depending on the desired outcome and the concentration of your bleach. It’s important to remember that bleach is potent, so I made sure to work in a well-ventilated area.
Preparing the Shirt:
With my supplies ready, I laid the shirt flat on my work surface. Since I wanted to create a unique design, I used stencils and tape to mask off certain areas of the shirt, leaving others exposed. This would result in a patterned effect once the bleach was applied.
Applying the Bleach:
Holding the spray bottle at a distance, I began applying the bleach solution to the exposed areas of the shirt. I worked quickly and carefully, ensuring that the bleach was evenly distributed and avoiding any drips or spills. For those who prefer a more hands-on approach, bleach can also be applied using a sponge or brush.
Allowing the Bleach to Work:
After applying the bleach, I allowed it to sit on the shirt for a few minutes, periodically checking its progress. Bleach works fast, so it’s essential to monitor the shirt closely to achieve the desired level of lightening. This step is where the magic happens as the bleach transforms the fabric before your eyes.
Rinsing and Washing:
Once satisfied with the bleaching effect, I rinsed the shirt thoroughly with cold water to halt the bleaching process. It’s crucial to remove all traces of bleach to prevent any damage to the fabric. After rinsing, I washed the shirt separately in cold water with mild detergent to remove any remaining bleach residue.
Inspecting the Results:
After the shirt had dried, I eagerly inspected the results of my bleaching experiment. The once plain shirt now boasted a unique pattern, thanks to the strategic application of bleach. The transformation was truly remarkable, and I couldn’t wait to show off my handiwork.
Bleaching a shirt at home proved to be a rewarding DIY project that allowed me to breathe new life into an old garment. With some creativity and careful execution, anyone can try their hand at bleaching shirts to create one-of-a-kind pieces that reflect their personal style. Just remember to exercise caution when working with bleach and have fun experimenting with different techniques and designs!
You can also like to read How to sublimate on dark polyester shirts? Two Methods in One.
Designing Unique Patterns with Shirt Bleaching
Through trial and error, I’ve discovered various techniques that allow me to unleash my creativity and transform plain shirts into wearable works of art. Join me as I share my personal journey and the methods I’ve mastered for creating specific designs with bleach right in the comfort of my own home.
Stencils: Crafting Precision
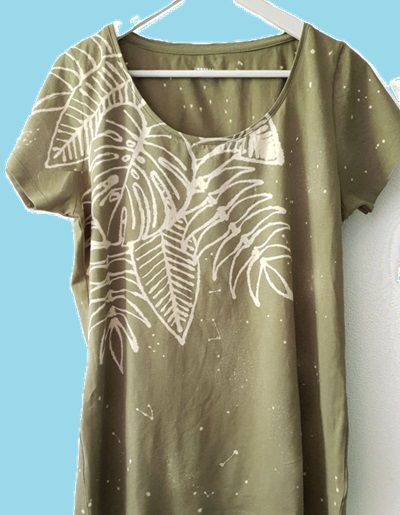
One of my favorite methods for creating specific designs involves the use of stencils. Armed with pre-made stencils or ones I’ve crafted myself, I carefully position them on the shirt and secure them with tape. With a steady hand, I apply bleach around the stencil openings, ensuring even coverage. Removing the stencil reveals a crisp and precise design, adding a touch of sophistication to the shirt.

Tape or Vinyl: Precision with Adhesive
Another technique I’ve explored is using tape or adhesive vinyl to craft intricate designs. By cutting out shapes or patterns and adhering them directly to the shirt, I create a barrier that prevents bleach from reaching certain areas. After applying bleach around the edges of the tape or vinyl, I carefully peel them away to unveil my meticulously designed motifs. This method offers endless possibilities for creating intricate and detailed patterns.
Freehand: Unleashing Creativity
For moments of spontaneous creativity, I rely on the freehand technique to design unique and organic patterns. Armed with a brush or sponge, I let my imagination run wild as I apply bleach directly onto the shirt, drawing intricate designs and motifs. This method allows for artistic expression and yields one-of-a-kind results that reflect my personal style and creativity.
Tie-Dye: Vintage Vibes
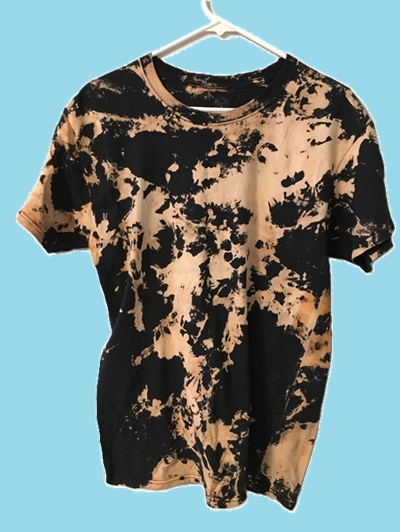
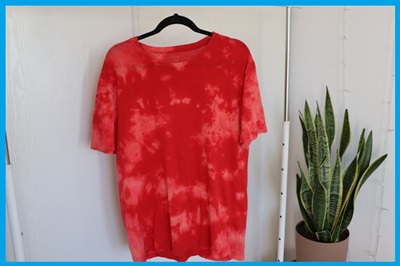
When aiming for a retro-inspired look, tie-dyeing with bleach is my go-to technique. I twist, fold, and secure the shirt with rubber bands before applying bleach in strategic areas. As the bleach works its magic, the rubber bands create mesmerizing patterns and gradients, resulting in a cool and vintage vibe that adds character to the shirt.
Gradient Effect: Stylish Ombre
Achieving a stylish ombre effect is another exciting aspect of shirt bleaching. By starting with heavy bleach application at one end of the shirt and gradually lightening the application towards the other end, I create a seamless gradient effect that adds depth and dimension to the design. Whether using a spray bottle for a subtle transition or a sponge for more defined gradients, this technique elevates the shirt’s aesthetic appeal.

Safety Tips When Bleaching a Shirt
Here are some safety tips for bleaching a shirt:
- Ventilation Matters: Work in a place where there’s fresh air, like outside or in a room with windows open. This helps avoid breathing in strong bleach fumes.
- Protect Yourself: Wear rubber gloves and glasses to shield your skin and eyes from bleach splashes. It’s like wearing armor to keep you safe.
- Keep Skin Safe: Don’t touch bleach with your bare hands. If it accidentally gets on your skin, rinse it off right away with water.
- Protect Surfaces: Put down old newspapers or a plastic sheet to stop bleach from spilling and damaging your table or floor.
- Dilute Bleach: Mix bleach with water as directed. This makes it less strong and safer to use.
- No Mixing: Don’t mix bleach with other stuff like ammonia or vinegar. Mixing can create harmful gases.
- Keep Away from Kids and Pets: Keep bleach out of reach of kids and pets. It’s not a toy, and it can be dangerous if they touch it or drink it.
- Dispose Carefully: When you’re done, get rid of leftover bleach and bleach-soaked stuff safely. Follow the rules for your area and never pour bleach down the sink or toilet.
Conclusion
With each project, I’ve honed my skills and gained confidence in my ability to customize shirts according to my preferences. From tie-dye effects to gradient ombres, the possibilities for design are endless, and the satisfaction of seeing my vision come to life is unparalleled.
So, as you start your own journey of shirt bleaching, remember to embrace the process, explore your creativity, and most importantly, have fun. With this guide and your own unique vision, you’re ready to unleash your inner artist and transform plain shirts into works of art, mastering the art of how to bleach a shirt at home.


