|
Listen to article
Getting your Trinity Audio player ready...
|
Are you eager to explore the world of sublimation printing but unsure how to do sublimation with Cricut Explore Air 2? Fear not, as we’re here to guide you through the process step by step. While the Cricut Explore Air 2 isn’t specifically designed for sublimation, with the right techniques and tools, you can achieve stunning sublimation prints.
In this comprehensive guide, we’ll walk you through the essential steps to successfully execute sublimation projects with your Cricut Explore Air 2, from designing your artwork to transferring it onto your chosen materials. Let’s go in and unlock the potential of sublimation printing with your Cricut Explore Air 2.
Contents
- 1 What is Cricut Explore Air 2?
- 2 How to Do Sublimation with Cricut Explore Air 2
- 3 FAQs
- 3.1 1. What materials can I use for sublimation printing with my Cricut Explore Air 2?
- 3.2 2. Do I need a special printer for sublimation printing?
- 3.3 3. Can I use regular inkjet ink for sublimation printing?
- 3.4 4. Do I need a heat press for sublimation printing?
- 3.5 5. Why do I need to mirror my designs for sublimation printing?
- 3.6 6. Can I wash sublimation prints?
- 3.7 7. Why are my sublimation prints coming out blurry or faded?
- 4 Conclusion
What is Cricut Explore Air 2?
The Cricut Explore Air 2 is like a crafting superhero in a compact machine. It’s a nifty gadget that lets you cut through all sorts of materials with incredible precision, whether it’s paper for scrapbooking, vinyl for decals, or fabric for sewing projects. But it doesn’t stop there! This little wonder also has the power to draw with pens and markers, adding another layer of creativity to your projects.
What makes the Explore Air 2 even cooler is its partnership with Cricut Design Space. This software is like your crafty sidekick, helping you bring your wildest ideas to life with its easy-to-use design tools and a treasure trove of project ideas. Plus, the Explore Air 2 can connect wirelessly to your devices, so you can design and cut from the comfort of your couch or crafting table.
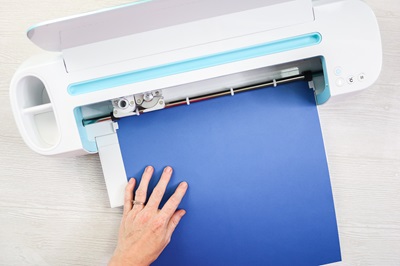
Crafters of all levels love the Explore Air 2 for its versatility, simplicity, and ability to turn imagination into reality. Whether you’re a DIY enthusiast or a seasoned pro, this cutting machine is sure to become your favorite crafting companion.
You can also know about What is the difference between DTF and sublimation printing? Best Option.
How to Do Sublimation with Cricut Explore Air 2
Sublimation printing is a unique process that involves transferring dye onto a substrate using heat. Unlike traditional printing methods, sublimation ink transforms from a solid to a gas without passing through a liquid phase, allowing it to penetrate the surface of the material and create vibrant, long-lasting prints. Sublimation works best on materials with a high polyester content, as the dye molecules bond easily with polyester fibers.
Sublimation printing with a Cricut Explore Air 2 can be a bit tricky because the Explore Air 2 is not designed specifically for sublimation. However, it’s still possible to do sublimation with it if you follow these steps:
Materials Needed:
Before diving into your first sublimation project with your Cricut Explore Air 2, it’s essential to gather all the necessary materials:
- Sublimation printer and ink: Invest in a sublimation printer and compatible ink cartridges. These printers are specially designed to handle sublimation ink and produce high-quality prints.
- Sublimation paper: Purchase sublimation paper, which has a special coating that allows it to absorb sublimation ink and release it onto your substrate during the heat transfer process.
- Substrate: Choose materials with a high polyester content, such as polyester fabric, polyester-coated items (e.g., mugs, mousepads), or specially coated sublimation blanks.
- Heat press: You’ll need a heat press capable of reaching temperatures between 375°F to 400°F for sublimation printing. Ensure your heat press provides even heat distribution and consistent pressure across the entire printing area.
Designing Your Artwork:
Use design software like Adobe Photoshop, Illustrator, or even Cricut Design Space to create your sublimation designs. Keep in mind that sublimation prints are transferred in reverse, so be sure to mirror your design horizontally before printing.
Printing Your Design:
Load sublimation paper into your sublimation printer and print your mirrored design onto the paper using sublimation ink. Ensure your printer settings are optimized for sublimation printing to achieve the best results.
Preparing Your Material:
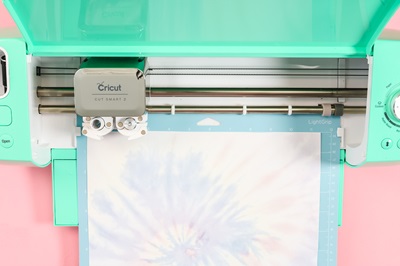
Cut your substrate to the desired size and shape using your Cricut Explore Air 2. While the Explore Air 2 isn’t specifically designed for sublimation, it can still be used to cut materials like polyester fabric or sublimation blanks. Secure your material to the cutting mat and adjust the settings in Cricut Design Space to match the material you’re working with.
Heat Press Setup:
Preheat your heat press to the appropriate temperature for sublimation printing (typically between 375°F to 400°F). Place a sheet of butcher paper or Teflon sheet on the bottom platen of the heat press to protect your substrate and absorb excess ink.
Transferring Your Design:
Position your substrate face down on the bottom platen of the heat press. Place your printed sublimation paper face down on top of the substrate, ensuring it’s correctly aligned with your design. Cover the entire setup with another sheet of butcher paper or Teflon sheet to protect your heat press and prevent any ink from transferring onto the platen.
Pressing Your Design:
Close the heat press and apply firm, even pressure for the recommended duration (typically around 45-60 seconds). Avoid using too much pressure, as this can cause your design to blur. Once the time is up, carefully lift the top platen of the heat press and remove the butcher paper or Teflon sheet.
Cooling and Finishing:
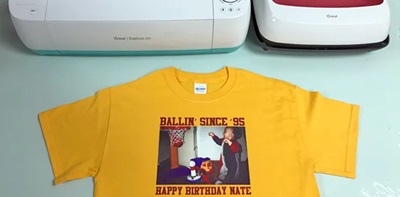
Allow your substrate to cool completely before handling it. Once cooled, carefully peel away the sublimation paper to reveal your vibrant, full-color design. Your sublimated creation is now ready to be admired and enjoyed!
Tips:
- If your prints appear faded or blurry, ensure your heat press is set to the correct temperature and pressure.
- Make sure your substrate is clean and free of any wrinkles or creases before pressing.
- Experiment with different substrates and printing techniques to find what works best for your projects.
FAQs
1. What materials can I use for sublimation printing with my Cricut Explore Air 2?
Sublimation printing works best on materials with a high polyester content, such as polyester fabric, polyester-coated items (e.g., mugs, mousepads), or specially coated sublimation blanks. You can use your Explore Air 2 to cut these materials to size before transferring your designs.
2. Do I need a special printer for sublimation printing?
Yes, you’ll need a sublimation printer that’s compatible with sublimation ink. Sublimation printers are specially designed to handle the unique properties of sublimation ink and produce high-quality prints.
3. Can I use regular inkjet ink for sublimation printing?
No, regular inkjet ink will not work for sublimation printing. Sublimation ink is specifically formulated to transform from a solid to a gas under heat and bond with polyester fibers, resulting in vibrant, long-lasting prints.
4. Do I need a heat press for sublimation printing?
Yes, a heat press is essential for sublimation printing. You’ll need a heat press capable of reaching temperatures between 375°F to 400°F to transfer your designs onto your chosen materials.
5. Why do I need to mirror my designs for sublimation printing?
Sublimation prints are transferred in reverse during the heat pressing process. Mirroring your designs ensures that they appear correctly once transferred onto your substrate.
6. Can I wash sublimation prints?
Yes, sublimation prints are durable and can withstand regular washing without fading or peeling. However, it’s essential to follow the care instructions for your specific substrate to ensure longevity.
7. Why are my sublimation prints coming out blurry or faded?
Blurry or faded prints can result from incorrect heat press settings, insufficient pressure, or poor-quality sublimation paper. Ensure your heat press is set to the correct temperature and pressure for sublimation printing, and use high-quality sublimation paper for best results.
Conclusion
Mastering sublimation printing with your Cricut Explore Air 2 opens up a world of creative possibilities. While the Explore Air 2 isn’t specifically designed for sublimation, with the right techniques and tools, you can achieve stunning sublimated designs. Remember to choose materials with a high polyester content, use sublimation ink and paper, and ensure your heat press is set to the correct temperature and pressure.
With your Explore Air 2 as your creative companion, you’ll be amazed at the vibrant, long-lasting sublimation prints you can create. So dig in, experiment, and let your imagination run wild as you discover the endless possibilities of how to do sublimation with Cricut Explore Air 2.
