|
Listen to article
Getting your Trinity Audio player ready...
|
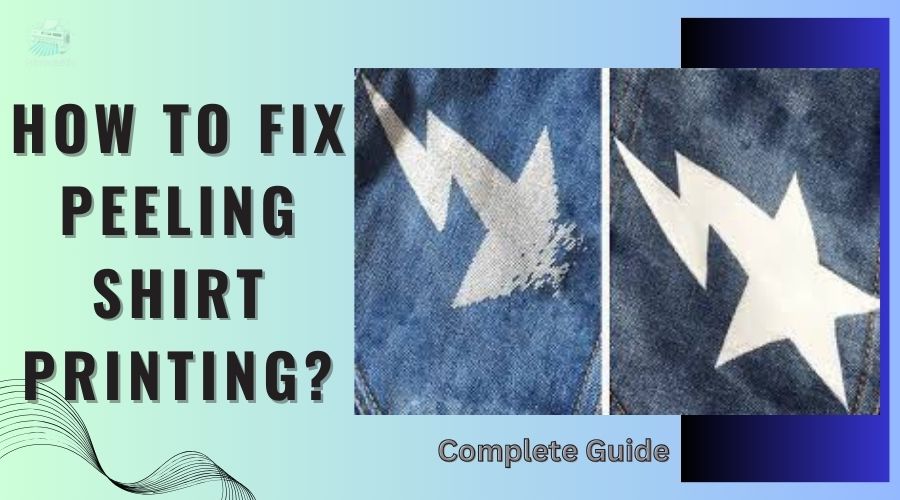
Is your favorite shirt suffering from peeling printing? Nothing dampens the excitement of wearing your favorite tee more than seeing its vibrant design begin to deteriorate. But how to fix peeling shirt printing? Fear not!
In this comprehensive guide, we’ll walk you through the steps to revive your shirt’s printing and restore it to its former glory. Whether it’s a cherished memento or a beloved wardrobe staple, learning how to fix peeling shirt printing can prolong the life of your garments and keep you looking stylish. So, let’s go in and learn how to bring back that crisp, vibrant look!
Contents
What causes prints to peel?
The prints on shirts peel for a few reasons. First off, if the materials used for printing are cheap or not up to par, they’re more likely to peel sooner. Also, if the printing process isn’t done just right, like if there’s too much heat or pressure, it weakens how well the print sticks to the fabric, making it easier to peel.
Some fabrics, especially those that stretch a lot, can cause prints to peel faster, especially when you pull or stretch the shirt.
Then there’s how you wash and dry your shirts. If you use harsh detergents, wash with super hot water, or throw them in a high-heat dryer, it can speed up the peeling process.
And of course, as shirts get older and you wear them more, the prints naturally start to wear out too, leading to cracking and peeling.

To keep your prints looking fresh, use good-quality materials, be careful during printing, pick fabrics that work well with printing, and follow care instructions properly. That way, you can keep those prints looking sharp for longer. Now let’s know how to fix peeling shirt printing.
You can also interested to read How long does printer ink stay on skin? Know Details
How to Fix Peeling Shirt Printing – Personal Guide
Fixing peeling shirt printing can feel like a bit of a DIY adventure, but armed with the right tools and a touch of patience, it’s a challenge worth tackling. Here’s how I typically go about it:
Close Inspection:
Whenever I notice peeling on one of my favorite shirts, my first step is always a close inspection. I take my time examining the affected areas, running my fingers over the edges of the peeling print to gauge the extent of the damage. Understanding the scope of the problem helps me plan my repair strategy effectively.
Preparation is Key:
Once I’ve assessed the damage, I gather all the necessary supplies. It’s like gearing up for a mission – fabric glue, an iron, a pressing cloth, and if needed, a fabric marker or paint for touch-ups. Having everything within reach ensures a smooth repair process without any interruptions.
Setting the Stage:
With my supplies at the ready, I lay the shirt out on a clean, flat surface, usually my trusty ironing board. I take a moment to smooth out any wrinkles, creating a pristine canvas for the repair work ahead.
The Delicate Operation:
Using my fingers or a pair of tweezers, I delicately lift the edges of the peeling print. It’s like performing surgery, except with fabric glue instead of sutures. I apply just the right amount of adhesive underneath, making sure to spread it evenly for maximum adhesion.
Pressing Matters:
Once the glue is in place, I gently press down on the print, ensuring it adheres firmly to the fabric. Then comes the crucial step of covering the repaired area with a pressing cloth. It’s like shielding the delicate skin of a patient during surgery, protecting it from direct heat.

The Heat of the Moment:
With the iron set to a low to medium heat, I carefully apply heat to the pressing cloth, focusing on the repaired section of the print. It’s a delicate dance, moving the iron in circular motions, ensuring the adhesive activates without damaging the fabric.
Patience is a Virtue:
After ironing, I resist the urge to rush things. Instead, I allow the repaired area to dry completely, giving the fabric glue ample time to set and bond with the fabric. It’s like waiting for a patient to recover from surgery – patience is key for a successful outcome.
Finishing Touches:
If any areas of the print appear faded or lost color during the repair process, I whip out my fabric marker or paint. It’s like adding the final brushstrokes to a masterpiece, ensuring the repaired print blends seamlessly with the rest of the design.
The Moment of Truth:
Once everything is dry, I give the shirt a final once-over, inspecting the repaired area to ensure the print is securely attached. It’s a moment of satisfaction, knowing I’ve successfully breathed new life into a beloved garment.
And there you have it – my experience in detail, fixing peeling shirt printing one carefully executed step at a time.
Care Tips
Taking good care of your shirts can go a long way in preserving the integrity of their prints and ensuring they stay looking fresh for as long as possible. Here are some care tips based on my experience:
- Follow Washing Instructions: Always check the care label on your shirts for specific washing instructions. Follow these guidelines carefully to avoid damaging the fabric or print. Use a gentle detergent and wash your shirts in cold water whenever possible to prevent color fading and minimize wear on the print.
- Turn Shirts Inside Out: Before tossing your shirts into the washing machine, turn them inside out. This helps protect the print from rubbing against other garments or the agitator, reducing the risk of abrasion and peeling.
- Avoid High Heat: When drying your shirts, opt for a low heat setting or air-dry them instead of using a high-temperature dryer. Excessive heat can weaken the bond between the print and the fabric, leading to premature cracking and peeling.
- Handle with Care: When ironing your shirts, avoid directly ironing over the print. Instead, iron them inside out or use a pressing cloth to protect the design from heat. Be cautious not to apply too much pressure, as this can also damage the print.
- Store Properly: Store your shirts in a cool, dry place away from direct sunlight to prevent color fading and deterioration of the print. Avoid hanging them on wire hangers, as these can leave impressions on the shoulders of your shirts.
- Spot Clean When Needed: If you notice any stains or spots on your shirts, spot clean them as soon as possible to prevent them from setting into the fabric. Use a mild detergent and a soft brush or cloth to gently dab at the stain, working from the outside in to avoid spreading it further.
- Rotate Your Wardrobe: Avoid wearing the same shirts too frequently to give them time to recover between wears. Rotating your wardrobe helps reduce the strain on the fabric and print, prolonging their lifespan.
- Handle with Clean Hands: When putting on or taking off your shirts, try to handle them with clean hands to avoid transferring oils and dirt onto the fabric. This helps maintain the cleanliness of the shirt and prevents any potential staining or discoloration.

FAQs
1. Can I fix peeling shirt printing at home?
Yes, you can fix peeling shirt printing at home with the right materials and techniques. It typically involves using fabric glue or adhesive to reattach the peeling edges of the print and applying heat to activate the adhesive and bond the print to the fabric.
2. Can I wash my shirt after fixing the peeling printing?
It’s best to wait until the adhesive used to fix the peeling printing has fully dried and bonded with the fabric before washing the shirt. Follow the washing instructions on the care label of the garment to ensure the longevity of the repaired print.
Conclusion
Wrapping up this burning question how to fix peeling shirt printing? Fixing peeling shirt printing is totally doable, even if you’re not a DIY expert. Following these simple steps helps you revive your shirts in no time. Just gather your tools, take it step by step, and soon you’ll be enjoying your favorite tees again, free from peeling hassles. It’s as easy as that!


