|
Listen to article
Getting your Trinity Audio player ready...
|
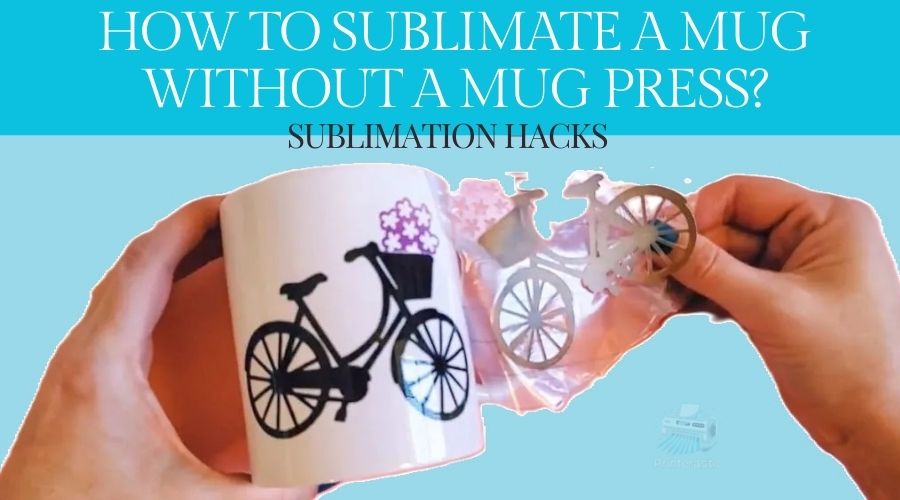
Hello again creative minds! Today, we’re digging into the fascinating empire of sublimation hacks, specifically focusing on the art of transforming plain mugs into personalized masterpieces without the luxury of a conventional mug press. So, how to sublimate a mug without a mug press? Well, stick with me as we spill the beans on some creative alternatives, utilizing things like your trusty oven or a handy heat gun. It’s like giving your mugs a makeover but without the hefty price tag or the need for fancy equipment.
So, I am happy to here with this guide, I am ditching the traditional methods and grabbing a more hands-on approach. I will walk you through the process step by step, sharing not only the how-to but also some useful tips and tricks to ensure your mug-sublimation adventure is not just cost-effective but downright enjoyable.
Contents
- 1 How to sublimate a mug without a mug press – The Short Answer
- 2 The Detail Answer
- 3 FAQs
- 3.1 1. Can I use any mug for sublimation without a press?
- 3.2 2. How do I secure the design on the mug without a press?
- 3.3 3. Can I sublimate multiple mugs at once without a press?
- 3.4 4. Can I sublimate other items using these hacks, or is it just for mugs?
- 3.5 5. Are there any safety precautions I should take when using alternative methods?
- 4 Conclusion
How to sublimate a mug without a mug press – The Short Answer
The Short Answer is that sublimating a mug without a mug press can be done using alternative methods such as an oven or a heat gun. One such method involves utilizing a conventional oven. By preheating the oven to the recommended temperature, typically around 375°F, the mug can be carefully placed inside for a specific duration, usually ranging from 12 to 15 minutes. Additionally, a heat gun can be employed as an alternative, providing a hands-on approach by evenly applying heat to the mug’s surface and ensuring the successful transfer of the sublimation design.

The Detail Answer
Sublimating a mug is a fantastic way to add a personal touch and unleash your creativity onto everyday items. So, I recently ventured into the world of sublimating mugs, and guess what? I did it without a fancy mug press! It was a bit of trial and error, but let me walk you through my experience and the step-by-step process of sublimating a mug without the usual press.
Materials on Hand:
- Blank mug (I went for a plain white one)
- Sublimation paper
- Sublimation ink
- My go-to design software and printer
- Heat-resistant tape
- A trusty oven
Step 1: Mug Design
First things first, I had to decide on the design for my mug. After playing around with a few ideas, I settled on a cool graphic. Keep in mind that light-colored mugs work best for vibrant designs.
Step 2: Printing
Printed my chosen design on sublimation paper. Oh, and don’t forget to mirror the image before printing – it’s a game-changer!
Step 3: Mug Preparation
Gave my mug a good scrub to ensure it was perfectly clean. Any dust or grease can mess with the sublimation process, so cleanliness is key.
Step 4: Securing the Design
Used heat-resistant tape to secure the sublimation paper to the mug. Took a bit of finessing to get it just right, but practice makes perfect.
Step 5: Three Methods without a mug press
- Popped the mug into my regular kitchen oven, and preheated it to around 375°F. Now, the waiting game begins – about 12-15 minutes of it. I peeked in a couple of times, I admit it – couldn’t contain my excitement.
- Another way is the heat gun method. Which I don’t use but I will share it with you. After the mug is securely taped, use a heat gun to evenly apply heat to the design. Keep the gun moving to prevent uneven heating. This method requires a bit more precision and patience.
- There is another method in an Air Fryer. Begin by preheating your air fryer to 375°F, allowing it to reach the desired temperature for about 10 to 15 minutes. Once ready, carefully position your prepared mug inside the air fryer. In case the mug doesn’t fit on the tray, you can place it on one side. Proceed to heat each side for 3 minutes, ensuring to flip the mug after the initial 3 minutes on each side. This process ensures even heat distribution for optimal results.
Step 6: Cool and Unwrap
Once the timer beeped, I carefully took the mug out. It was hot, so patience was key. Removed the tape and sublimation paper, and voila – there it was, my customized mug!

Step 7: Sip and Enjoy
After letting it cool for a bit, I filled that mug with my favorite beverage and basked in the glory of a personalized creation. It might not be as quick as using a mug press, but the satisfaction? Totally worth it.
So there you have it – my adventure in sublimating a mug without the conventional press. If I can do it, you can too! Give it a shot and enjoy the creative journey. Cheers!
Sublimation Tips and Hacks
So, diving into the world of sublimation, I’ve picked up some useful tips and hacks along the way that have really upped my customization game. Here’s my experience:
- Trust me, always mirror your designs before hitting that print button. It ensures your final creation looks exactly as you imagined when transferred onto your chosen item.
- When it comes to materials, go for ones with a good polyester coating or a high polyester content. The more polyester, the more vibrant and long-lasting your prints will be.
- Prepare your canvas! A clean surface is crucial for top-level sublimation. Get rid of any dust, oils, or leftovers that might throw off your masterpiece.
- Tape is your friend. Use heat-resistant tape strategically when securing your sublimation paper. You want it to stay in place but not hog the spotlight.
- Experiment with different temperatures and pressing times. Each material might have its sweet spot, so find it for optimal results.
- Don’t play with fire – literally! Use heat-resistant gloves when handling freshly sublimated items. Burns are not a trendy accessory.
- A light mist on your sublimation paper before pressing can sometimes bring out the colors like magic.
- No heat press? No problem. My oven has become a trusty sidekick for sublimation. Just make sure to follow the recommended guidelines for temperature and time.
- Cue the heat gun – a versatile tool for sublimation. Perfect for focusing heat on smaller items or specific areas, giving you more control over the process.
- Sublimation can get messy. Lay down protective sheets or set up a designated area to shield your surroundings from stray ink and leftovers.
- If you’re working with a mix of materials, use heat-resistant tape to cover areas you want to keep ink-free. It’s like a precision artist’s brush for your sublimation canvas.
These tips and hacks have turned my sublimation journey into a series of exciting experiments. Remember, there’s always room for creativity and discovery – happy sublimating!

FAQs
1. Can I use any mug for sublimation without a press?
Ideally, choose a mug with a smooth, light-colored coating for the best results. The smoother the surface, the better the sublimation transfer.
2. How do I secure the design on the mug without a press?
Use heat-resistant tape to secure the sublimation paper onto the mug. Make sure it’s well-positioned and tightly affixed for a clean transfer.
3. Can I sublimate multiple mugs at once without a press?
Yes, you can, especially if using an oven. Just ensure there’s enough space between the mugs for proper heat circulation, and rotate their positions during the process for even results.
4. Can I sublimate other items using these hacks, or is it just for mugs?
While these hacks are commonly used for mugs, they can be adapted for other sublimation-friendly items like plates, coasters, or certain types of fabric. Experimentation is key!
5. Are there any safety precautions I should take when using alternative methods?
A: Absolutely. When using an oven or a heat gun, be cautious of hot surfaces. Consider using heat-resistant gloves and always follow safety guidelines to prevent accidents during the sublimation process.
Conclusion
The journey may involve a bit of experimentation and learning, but the satisfaction of achieving personalized, professional-looking mugs without breaking the bank is well worth it. So, armed with these sublimation hacks, go ahead and unlock your creative potential – because now, you know how to sublimate a mug without a mug press!


